| West Coast IPA | IPA | 7% | Very clear after cold crashing to -1.5C for a week or so |
| Boring Bitter | Bitter | 1.050 OG | Cloudy! |
| Chocolate Orange Stout | Stout | ~7.9% | Not chocolatey enough. Next time I might try using nibs instead of shells in secondary. Also as well as using orange zest in secondary, might try using peel in boil. |
| Golden Cherry | Fruit Beer | 8% | Nice, but I think next time I’d like to try at least a kettle sour for the base. |
Introduction to homebrewing
Homebrewing is a fascinating hobby – by combining a range of simple ingredients it’s possible to produce
fantastic beer!
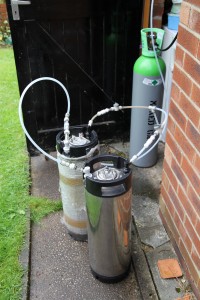
Sterile filtration using a 0.1 micron absolute filter
Click here for some info on sterile filtration (note – I don’t really advise doing this, as it does alter the flavour)
Kegs
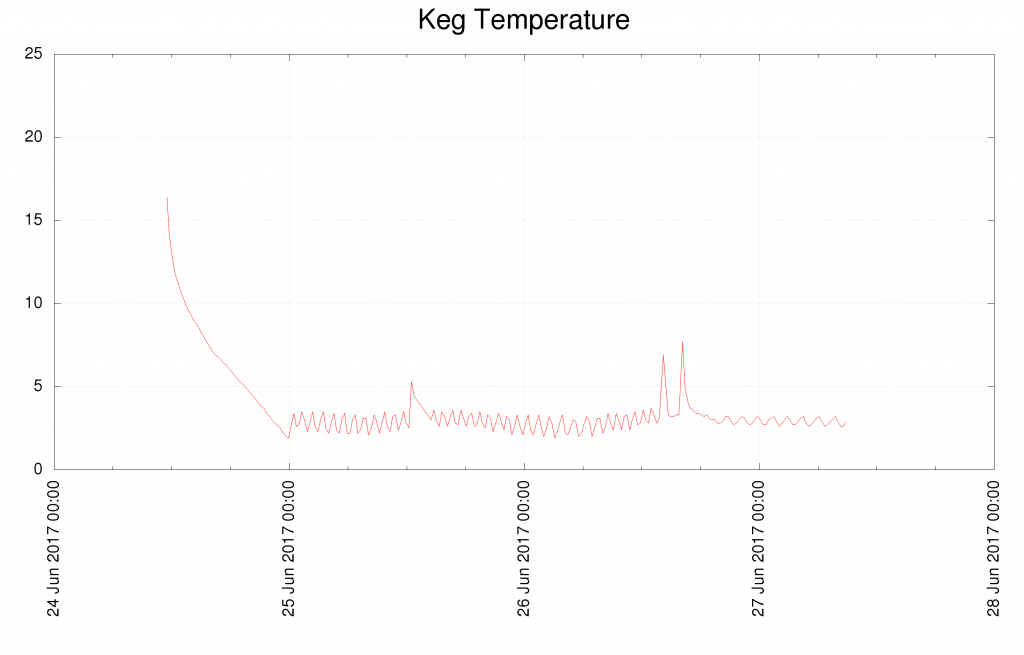
I had the probe positioned mid way on the keg. The inkbird had the temperature set to 2.7C.
When I pulled a small amount of beer through a tap, it was reading 7.1C, despite the temp probe reading around 2.7C.
I’ve since moved the temp probe to the very bottom of the keg, and it’s now reading 6.9C. I also used ratchet straps to secure the sponges to the probe more securely than duct tape.
I’m 80% sure before, the temp probe now might not have been touching the liquid, but just co2 in the keg. The oscillations now are much less pronounced in my opinion.
Fermentation temperature control with the Inkbird
Click here for an overview on how I setup fermentation control using
a beer chiller, SS coil and soil warming cable around the fermenter.
Playing with peltiers to try to control temperature
Click here for my attempt at trying to control fermentation temperature with 4 peltiers, which didn’t work. I think because the fan on the heatsink wasn’t powerful enough to cool the heat from 4 peltiers.
My plastic three vessel setup
Click here for some pics of my basic three vessel setup.
Simple attempt at a digital hydrometer
Click here for my simple attempt at a digital hydrometer, using a time-of-flight sensor, to measure a hydrometer’s displacement.
Things I need to start doing to improve my beer
Use SS LWD (low watt density) element for boiling – to try and reduce weird flavours. In the meantime though, with my kettle style element on JBK someone mentioned that if you continuously stir while the wort is getting up to boil, it will prevent the element going black and contributing to off flavours. I might try to use a pump to recirculate prior to the rolling boil, to do that for me. Also, clean element before/after each brew, possibly using a copper scrubber and citric acid.
Use irish moss
Chill beer faster with plate chiller?
Add calcium (which can apparently help with clarity), to take it to at least 50ppm
I need to leave my beer in the fermenter for at least 2 weeks, to help the yeast clean up properly.
I need to use fermentation temperature control! – Just starting to do this, hopefully the beer turns out well.
Measure the exact amount of water pumped through to the grain for mashing using a flow meter, so that the grain to water ratio is good.
Don’t let the sparged wort go below ~1.008 or you can get tannins
Boil for longer e.g. 90 mins to reduce DMS
Brew In A Bag (BIAB)
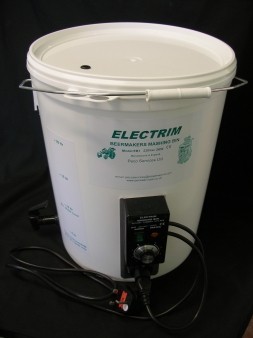
You simply fill the boiler with 5 gal water, and let it get up to around 71C (this is called the strike temperature), then switch it off. When you add the grain the temperature will drop to around 65C – the mashing temperature.
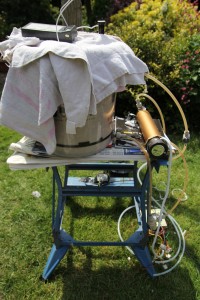
Then you put the grains in a bag, and put them in this water and leave them in the water for around an hour. Wrap the bucket in towels to help keep the bucket at the right temperature. (This is called mashing).
Then drain all the wort out, (the liquid from mixing water with the grain) into another bucket. As you want to collect 5 gal of liquid, (some of the water is absorbed by the grain) you do something called sparging, pouring more hot water (around 80C) onto the grains (leave this 80C water in the bucket with the grains for around 5mins) and then drain off into the bucket. You want to have collected ~5 gal of wort at the end of this.
Then remove the bag from the heated bucket. And pour all the wort into the heated bucket. Then turn on the boiler to full. And wait for it to start boiling, then add the hops in a bag, to the boiling bucket.
Normally you boil for around 60 minutes (you leave the lid off when boiling to avoid a buildup of something called DMS in the beer)
After that, you turn off the boiler, and cool as quickly as possible.
Once the beer is around 25C you can add the yeast.
RIMS
Recirculating Infusion Mash System is used in order to keep the wort in the mashing process at a fixed temperature.
In my system I make use of a pump, which is capable of around 11 litres / minute. I make use of an immersion heating tube, with a 3kW element inside (3kW is actually overkill, you’d only really need something like 1.5kW). In order to regulate the temperature of the wort, I made use a PID attached to the element and also a thermowell which is positioned at the end of the RIMS tube.
By using a recirculating system during the mashing process, the wort becomes very clear, as the wort is filtered through the grain bed.
Kegging
For homebrew beer a lot of people use something called a corney (Cornelius keg). These are especially easy to use, as they have a large lid which you can simply remove, to enable you to easily fill the beer.
There a two main gases used which are used in brewing carbon dioxide – which is the most generally used.
And also nitrogen – which tends to be used combined with carbon dioxide for kegged stouts such as Guinness. This is
known as mixed gas.
Corney kegs have two posts on the top, one for gas in, the other for liquid out. In order to use a gas tank you need to make use of a regulator. The regulator enables you to step-down the high pressure from the gas tank, to a more reasonable pressure for the beer.
There are two main types of regulator, one for mixed gas and the other type for pure CO2.
I highly recommend using John Guest fittings to connect beer pipes to the corney disconnects.
Experiments
Yeast
There are many experiments you can do involving yeast.
One such experiment I’ve done, involves splitting the 5 gallon batch of wort, into 5 separate containers. With each container you can ferment the beer, using a different yeast.
This gives you the opportunity to see how much of an effect the yeast has on the beer.
For instance a hefeweizen yeast will give a radically different flavor to your beer, than an english ale yeast.
Dry hopping
You can simple add fermented beer to a french cafetiere along with a small amount of hops.
You can then press the hops through the beer using it, in order to quickly dry hop the beer. However I would like to compare the results to dry hopping by adding the hops to the keg, and then leaving for a week, as I’ve been told by leaving it for a while, the taste evolves.
Recirculating dry hopping
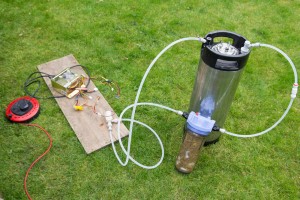
Dry hop bittering
scott janish – very cool information on how dry hops can increase IBUs
Books
- Yeast: The Practical Guide to Beer Fermentation (Brewing Elements) by Chris White, Jamil Zainasheff
- For the love of hops (Brewing Elements) by Stan Hieronymus
- Brewing Classic Styles: 80 Winning Recipes Anyone Can Brew by Jamil Zainasheff, Palmer John
- Mikkeller by Mikkel Borg Bjergsø, Pernille Pang
- Principles of Brewing Science: A Study of Serious Brewing: A Study of Serious Brewing Issues by George J. Fix
- Brew Like a Monk: Trappist, Abbey, and Strong Belgian Ales and How to Brew Them by Stan Hieronymus – Very enjoyable book, one of my favourite brewing books
- Brewing Beers Like Those You Buy by Dave Line – old book, but very enjoyable
- Brew Your Own British Real Ale By Graham Wheeler – good book for brewing classic British beers
Brewing TV shows
- Beer geeks – great show
- The Beer Hunter – excellent TV series, from the legendary beer writer Michael Jackson
- Brew Dogs TV Show (Episode 1) – some of the episodes of slightly over the top, but still entertaining
Notes
- Don’t leave the lid on when you’re boiling – this allows DMS (dimethylsulfide) to escape
- When batch sparging leave the sparge water to sit with the grain for at least 10 minutes
- Don’t stir the grain when you’ve mixed it, otherwise you’ll disrupt the grain bed
- During the boil the more water that boils off means the stronger your beer will be
- According to http://www.brewheads.com/strike.php your water for 5 gallons of strike water should be 71C
- The higher your fermentation temperature the more fusel alcohols that will be produced
- If you have an electric heating element in your mash tun DO NOT switch it on during the mash as you will burn the grain
- The higher the fermentation temperature the more fusel alcohols will be produced
- Hops should ideally be kept frozen for up to a year
- Purge the oxygen in your cornelius keg by filling with CO2 then venting, then refilling – repeat as many times as necessary
- There are two main types of cornelius keg – ball lock (pepsi) and pin lock (coke). The Pepsi ones are taller. They both have different types of disconnect http://www.youtube.com/watch?v=zeHF87wr4hE
- If you connect the corny gas disconnect to the keg, with no pipe, the keg WILL lose pressure.
- A CO2 gas tank shouldn’t have a dip tube. A dip tube for that is only to extract liquid CO2.
- “A tank for “Beer gas” (the 75-25 blend) will be outfitted with a specialized mixing dip tube in order to keep these gases blended at the proper ratio. Without the dip tube the nitrogen is dispensed first, and then the co2 once the added pressure from the nitrogen has disapated.”
- Brewing sugar (aka glucose/corn sugar) is better to use than white sugar
2 Comments
Leave Comment
Error

Kevin
I’ve never heard of anyone using a plastic bucket for boiling or hot-water-based steeping. I would be concerned about the PVC releasing chemicals into the brew.
admin
Thanks for your comment, the buckets are food grade polypropylene. I have recently obtained a stainless
steel keg, with a low watt density element though, which I’m looking forward to using soon 🙂