Take 1
I created a simple ‘weatherproofish’ Raspberry Pi camera setup, which I detail below:
I bought the following hardware:
- DRiBOX FL-1859-330G IP55 Large Weatherproof Box – Green
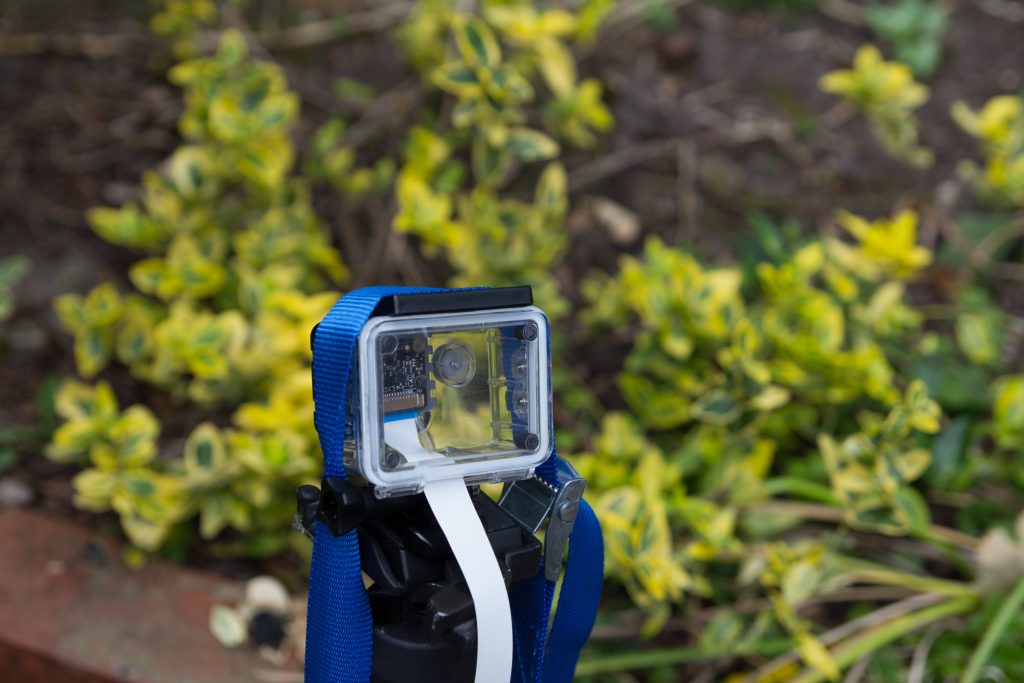
- Action Camera Case
- Originally I used Flex Cable for Raspberry Pi Camera – 2 meters
- Now I am using Flex Cable for Raspberry Pi Camera – 1 meters
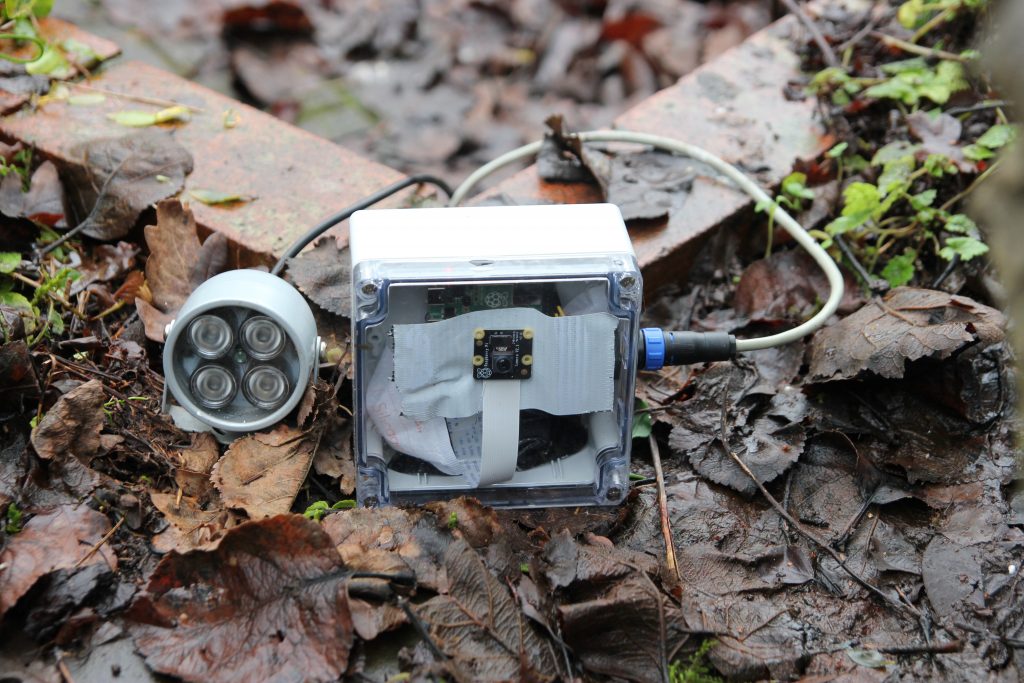
- LED IR Array Illuminator
- Raspberry Pi NoIR v2.1 8 MP 1080p Camera Module
With the LED IR light, I placed some duct tape over the LDR on it, so that it remains always on.
I used ZyXEL PLA5205 600 Mbps Powerline Gigabit Ethernet Adapter to attach to the Pis ethernet interface. This provides a fast network which can connect far away from my Wifi AP (my Wifi AP has a powerline adapter connected to its ports).
When streaming to youtube for a while, with the 2m cable I noticed image corruption occurring after a number of hours. However I also noticed the sunny connector had become slightly loose. I have now glued the sunny connector and am using a 1m cable now, when I streamed over night it worked well, after making a script which detects problems with the stream to youtube going down.
‘sudo vcdbg log msg’ gave the following when image corruption occurred:
3480690.655: vcos_abort: Halting
3482637.188: mmal: fail_destroy: Timed out waiting to destroy ril.camera
I stream to youtube using the following command (which was found on https://www.youtube.com/watch?v=S3zNBGfPFxI – I also followed his guide for installing ffmpeg).
raspivid -o - -t 0 -fps 30 -b 6000000 | ffmpeg -re -ar 44100 -ac 2 -acodec pcm_s16le
-f s16le -ac 2 -i /dev/zero -f h264 -r 30 -i - -vcodec copy -acodec aac -ab 128k
-g 50 -strict experimental -f flv rtmp://a.rtmp.youtube.com/live2/...
Originally I used a bitrate of 1000000 (1Mbps) which I have been told is far too low! And could have been the cause of some of my videocore issues.
If you get message like the following in the videocore logs:
2582211.411: mmal: mmal_port_send_buffer: ril.video_encode:in:0(OPQV): send failed: EINVAL
2582211.446: mmal: mmal_port_connected_output_cb: ril.camera:out:1(OPQV) could not send buffer on port ril.video_encode:in:0(OPQV) (EINVAL)
2668226.995: mmal: mmal_port_send_buffer: ril.video_encode:in:0(OPQV): send failed: EINVAL
It could simply be due to the stream to youtube dropping due to flaky Internet, like mine!
I created a bash script, which is run as root, based on this command, which checks for the stream dropping and starts the stream again if necessary:
#!/bin/bash
function stream {
	sudo -u pi raspivid -v -o - -t 0 -fps 30 -b 1000000 | ffmpeg -re -ar 44100 -ac 2 -acodec pcm_s16le -f s16le -ac 2 -i /dev/zero -f h264 -r 30 -i - -vcodec copy -acodec aac -ab 128k -g 50 -strict experimental -f flv rtmp://a.rtmp.youtube.com/live2/  outp &
}

vcdbg log msg 2> vidcore

OLD="$(cat vidcore  | grep "ril.video_encode:in:0(OPQV): send failed: EINVAL" | tail -n1 | awk -F':' '{ print $1 }')"
stream;

while [[ 1 ]]
do

	sleep 20
	vcdbg log msg 2> vidcore
	grep "ril.video_encode:in:0(OPQV): send failed: EINVAL" vidcore > /dev/null
	RES=$?

	if [ $RES -eq 0 ]; then

		TIMEERR=$(cat vidcore  | grep "ril.video_encode:in:0(OPQV): send failed: EINVAL" | tail -n1 | awk -F':' '{ print $1 }')

		if [ "$TIMEERR" != "$OLD" ]; then
			echo "Net died, waiting 60 secs"
			pkill -9 ffmpeg
			sleep 60
			rm outp
			echo "starting stream again"
			stream;
		fi

		OLD=$TIMEERR
	fi
done
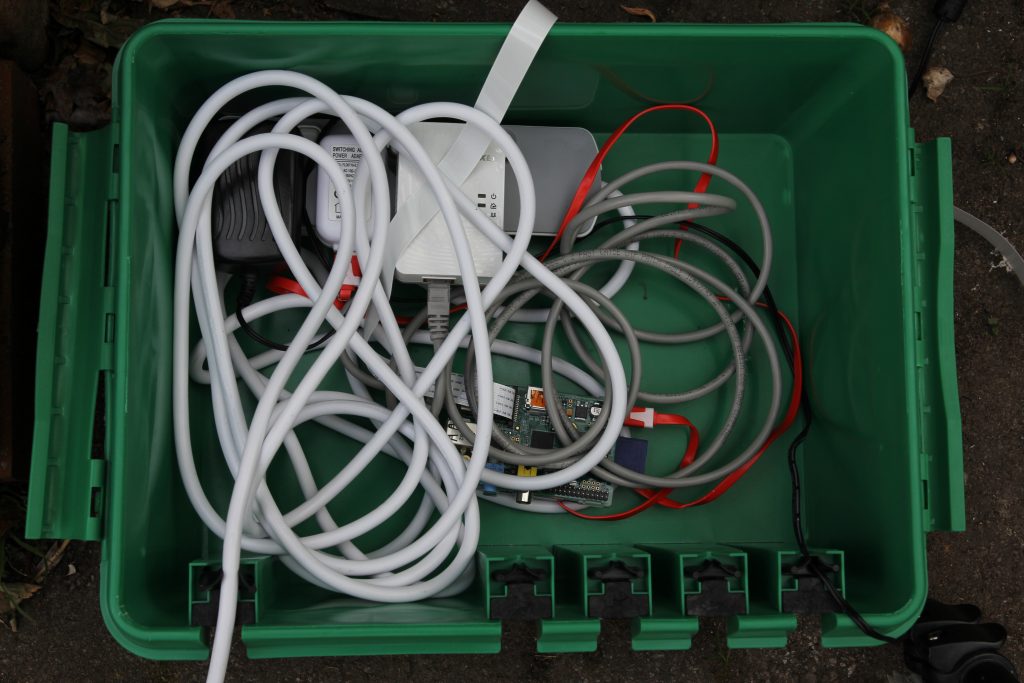
You can see all the hardware in the weatherproof box below:

The raspberry pi camera fits well in the waterproof housing, I managed to thread the camera cable between the two hinges of the waterproof casing 🙂

Oh dear, oh dear:
I believe using a flex cable outside is now a bad idea, likely due to moisture getting into the cable:
mmal: mmal_vc_component_create: failed to create component 'vc.ril.camera' (1:ENOMEM)
mmal: mmal_component_create_core: could not create component 'vc.ril.camera' (1)
mmal: Failed to create camera component
mmal: main: Failed to create camera component
mmal: Camera is not detected. Please check carefully the camera module is installed correctly
Take 2
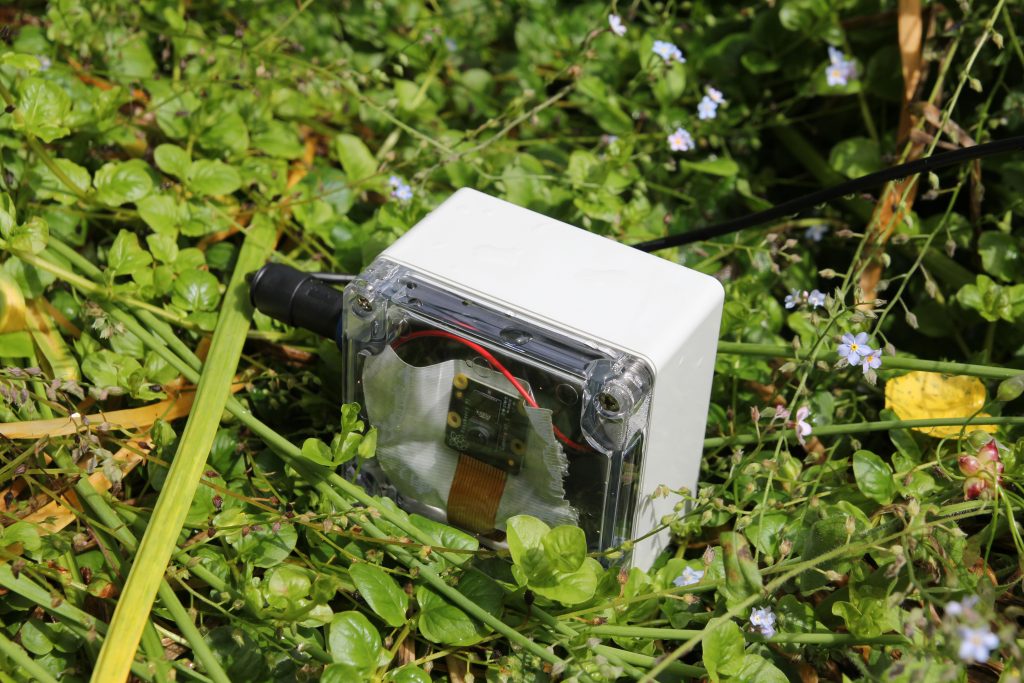
I created a new version of the camera using an IP68 case and a Pi Zero:
With the Pi Zero, I found it was necessary to add the following to the Pi’s config.txt (see the raspberry pi forum for more information on this issue):
over_voltage=2
force_turbo=1
In this version, the Pi connects to a wireless access point, instead of using an ethernet over powerline device.

Take 3
Eventually I created another version of the camera using an IP68 case and a Pi4, for increased reliability and performance.
- Larger IP68 case – I needed to use a larger case to fit the Pi4
- 2 pin power connector – this is mounted on the case
- Power source – this attaches to the connector on the case
- Solder socket – used for connector
- Solder pin – used for connector
With these IP68 cases, I found it was useful to rub silicone grease along the rubber ‘washer’ to help the seal. Also it’s important not to overtighten the screws of the case.
See the following video for how to wire the IP68 connector, I found before snapping the connector together (which can’t seem to be undone), that you should push the plug and socket parts together, then snap it together.
To fit the 2 pin power connector to the case, I first drilled a hole using a 14mm drill bit, and used a file to smooth the edges, so the connector would fit.

Take 4
I’ve now switched to using the following:
- CCTV enclosure, with glass window
- Raspberry Pi Camera Module 3 NoIR – Wide (has phase detect autofocus support)
- Adafruit Cable Gland – Waterproof RJ-45 / Ethernet connector – RJ-45
- PoE+ HAT
Originally with the CCTV enclosure I tried using a motorised IR cut filter and attaching a M12 5MP 1.7mm focal length wide angle lens. I focussed the lens during daytime, where the focus appeared very clear. However at night it became blurry, I’ve since read that the IR focal point, is different to visible light.
Leave Comment
Error
